 kage
kage
imagetoascii.art
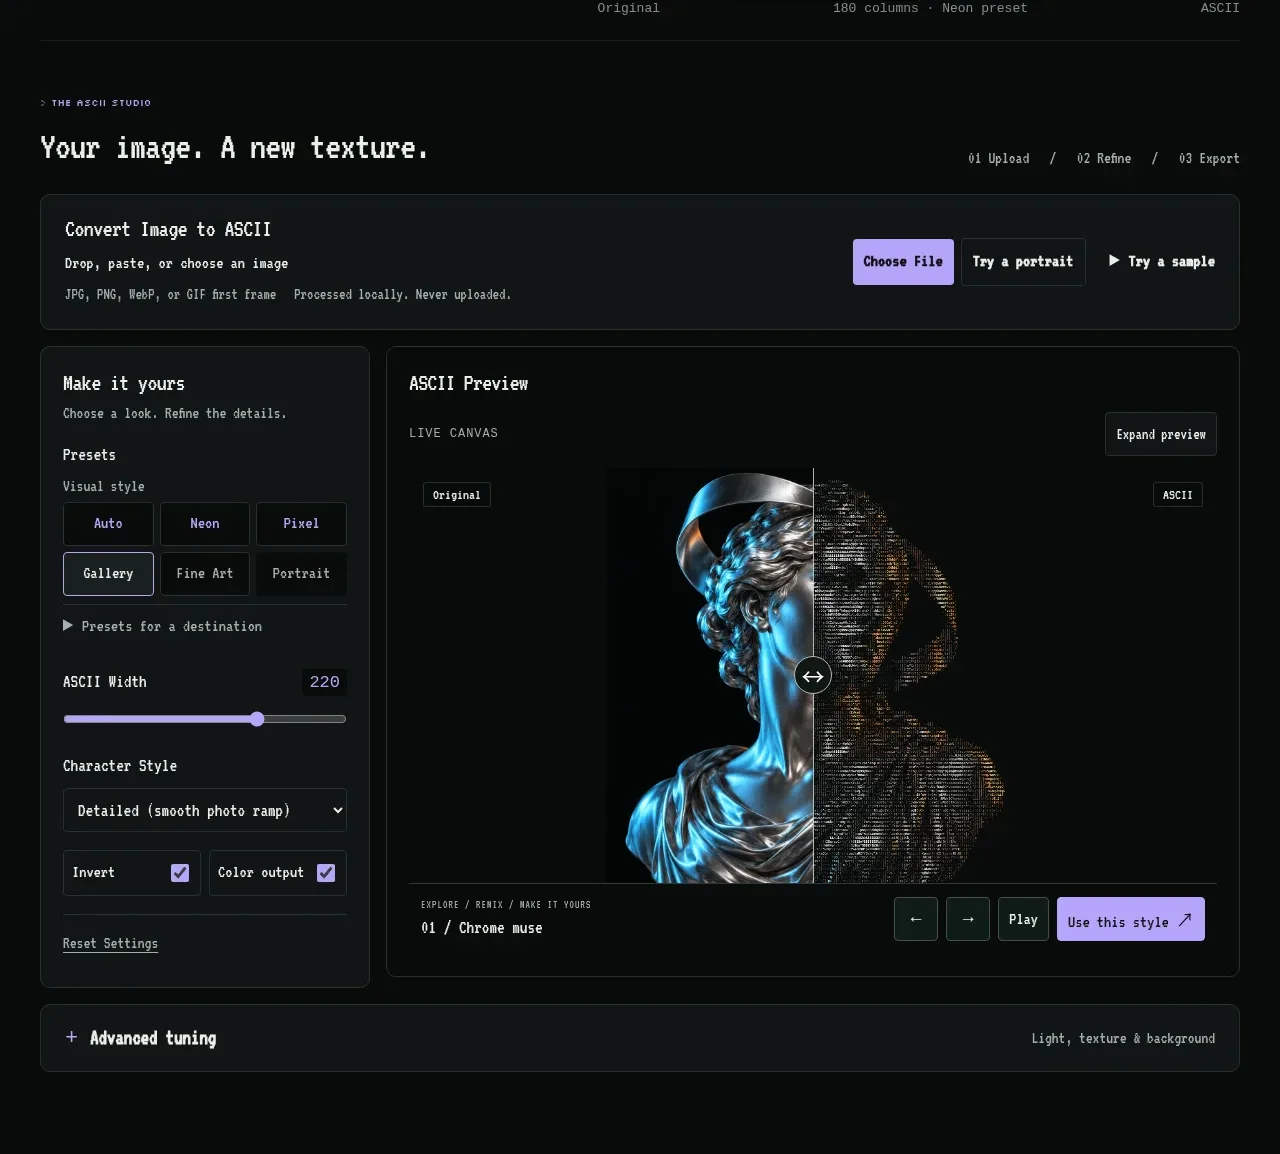
Design analysis
This interactive workbench is the product's core functional section: upload first, then refine settings beside a large live preview.
Prompt preview
## Reference images

Study these alongside the description below: hierarchy, rhythm, spacing, colour. Build for the product you are asked about, using this design language.

- Component: https://kage-design-assets.t3.tigrisfiles.io/components/image-to-ascii/536947f7-3504-43cd-9692-a327ad82583f-1789452197-2.webp
- Full page it was cut from: https://kage-design-assets.t3.tigrisfiles.io/screenshots/image-to-ascii/536947f7-3504-43cd-9692-a327ad82583f-1789452107158-full.webp
- Component on Kage: https://kage.design/component/image-to-ascii-form

## Before you start
Ask what users upload, what transformations they need, and which controls are essential for the user's product. Then apply the following interaction and visual principles to that workflow.

Build a dark conversion workbench inside a centered max-width container. Start with a bordered upload strip, then place a two-column editor below: a narrow settings panel on the left and a dominant live preview on the right. Use #0b0f0e surfaces over a #070a09 page, 1px borders in #26302d, 8px panel radius, and monospace labels in small uppercase or compact text. Make the upload area support drag-and-drop, file selection, paste, and a sample action. The controls should include preset buttons, a range slider, select/dropdown controls, checkboxes, and a reset affordance. Keep the preview visually primary, with a header, status labels, comparison handle, and bottom action row. Add an expandable “advanced” row beneath the editor. Use lavender (#b9a0ff) for primary actions and focus rings, green-gray (#a4c7b4) for success states, and restrained hover transitions. On mobile, stack settings above preview and keep actions reachable.

Never: use logos, product names, copy, illustrations, or imagery from the reference.


